
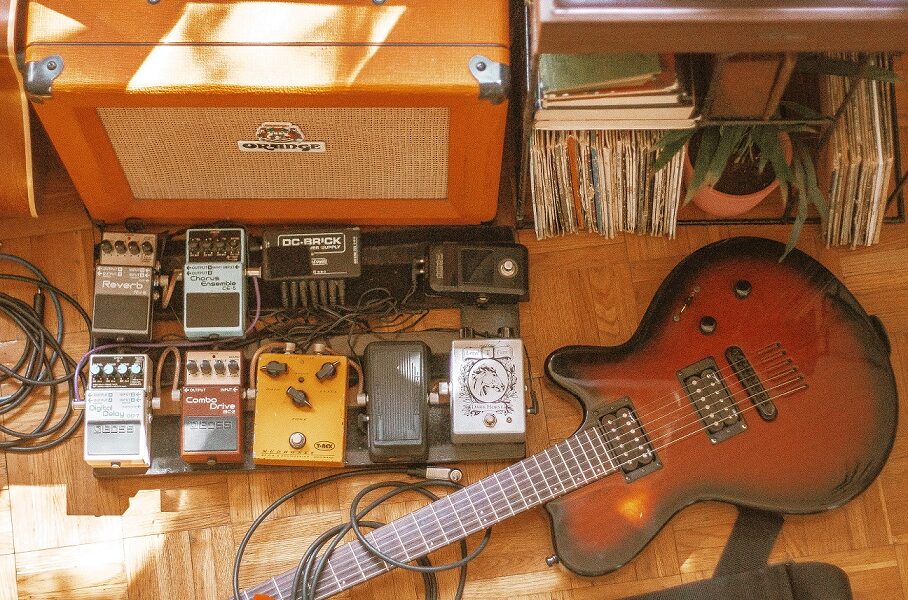
Your pedal board is more than just a collection of effects pedals. It’s a creative canvas where you craft your signature sound. To truly master your tone and playing experience, you need to pay attention to the layout of your pedals. A well-thought-out pedal board layout doesn’t just look neat; it enhances your performance and creativity by allowing you to access your effects quickly and efficiently. In this article, we’ll delve into the art and science of pedal board layout, exploring design principles, organization tips, and creative considerations to optimize your effects chain.
The Importance of Pedal Board Layout
A meticulously planned pedal board layout can have a profound impact on your overall playing experience. Here are some key reasons why layout matters:
- Efficiency: An efficient layout minimizes the time and effort it takes to switch between pedals during a performance. When your effects are well-organized, you can focus on playing and creating, rather than searching for the right stompbox.
- Reduced Signal Chain Interference: A logical layout minimizes the risk of cables crossing or bumping into each other. This helps reduce signal interference and unwanted noise in your signal chain.
- Creative Flow: When your pedals are logically arranged, you can better express your musical ideas. Your pedals become an extension of your creativity, allowing you to explore various tones effortlessly.
- Visual Aesthetics: A well-organized pedal board looks professional and is visually pleasing. It can make a positive impression on your audience and bandmates.
- Troubleshooting: In case of technical issues, an organized layout makes it easier to identify and address problems quickly. You can locate faulty cables or malfunctioning pedals without confusion.
Now, let’s explore the principles and tips for designing an efficient pedal board layout:
Principles of Pedal Board Layout
- Signal Flow: Organize your pedals in the order of your signal chain. The typical order is guitar > tuner > filters/dynamics > gain effects > modulation effects > time-based effects > amplifier. This sequence ensures that your signal flows logically through your effects.
- Frequency Management: Pay attention to frequency management when placing pedals. High-frequency pedals like wah-wahs and compressors should come before overdrive or distortion effects. This ensures that the dynamics are managed before they’re saturated or distorted.
- Footswitch Access: Place pedals you need to engage or disengage frequently within easy reach. Your most essential effects should be accessible with a quick foot movement.
- Space Consideration: Ensure that there’s enough space between your pedals to avoid accidental stomping on adjacent effects. You can use pedal risers or brackets to elevate some pedals for easier access.
- Power Supply Placement: Arrange your power supply in a location where it doesn’t interfere with your signal chain. Some pedal boards have built-in power supplies, but if you use an external one, position it to avoid cable clutter.
Layout Tips for Your Pedal Board
- Plan Ahead: Before attaching your pedals, lay them out on the board without securing them. This allows you to experiment with different arrangements to find the most efficient layout.
- Start from the End: When planning your layout, begin with the last pedal in your signal chain (usually reverb or delay) and work backward. This helps you avoid crowding your board with time-based effects early in the chain.
- Velcro or Mounting Tape: Use Velcro or mounting tape to attach your pedals securely to the board. This makes it easier to rearrange your pedals if necessary without leaving sticky residue.
- Cable Management: Neatly route your cables. Use cable clips, channels, or zip ties to bundle cables together and prevent tangling. Proper cable management is key to a clean and efficient layout.
- Under-Mounting: Some pedal boards have space underneath for routing and securing cables. Utilize this space for a cleaner appearance and reduced cable clutter on the surface.
- Patch Cables: Use high-quality patch cables to connect your pedals. Right-angle patch cables are particularly useful for minimizing the space needed for connections.
- Labeling: Consider labeling your pedals or using colored tape to indicate their function. This can be especially helpful if you have multiple pedals of the same make and model.
- Feedback Loops: If you use feedback loops or run one pedal into another, plan this into your layout carefully. These pedals can be strategically placed to create unique sonic textures.
Creative Considerations for Pedal Board Layout
- Create Signal Branches: For increased creativity, consider creating multiple signal paths or branches on your pedal board. This allows you to have different effects chains for different parts of a song or musical moods.
- Alternative Arrangements: Don’t be afraid to experiment with unconventional arrangements. Placing modulation effects before distortion, for instance, can create unique textures. Be open to exploring new sounds.
- Footswitch-Only Pedals: Some pedals don’t need to be in your signal chain, such as loopers or channel switchers. Place these footswitch-only pedals off to the side or in a dedicated section.
- Spatial Effects: If you use spatial effects like reverb or delay, position them strategically to take advantage of stereo imaging, particularly if your amplifier setup supports it.
- Incorporate Expression Pedals: If you use an expression pedal, plan for its location on the board and ensure it’s easily accessible for real-time parameter adjustments.
Pedal Board Layout Examples
To provide a visual representation of pedal board layout principles, let’s consider a few layout examples:
1. Standard Layout:
- Guitar
- Tuner
- Wah
- Compressor
- Overdrive
- Distortion
- Chorus
- Phaser
- Delay
- Reverb
- Amplifier
2. Creative Layout:
- Guitar
- Delay
- Phaser
- Overdrive
- Compressor
- Chorus
- Distortion
- Reverb
- Tuner
- Wah
- Amplifier
3. Spatial Effects Layout:
- Guitar
- Tuner
- Compressor
- Distortion
- Amplifier
- Delay A (left)
- Delay B (right)
- Reverb A (left)
- Reverb B (right)
- Chorus (stereo)
- Phaser (stereo)
These examples demonstrate different approaches to pedal board layout, from the traditional to the creative. The choice ultimately depends on your musical style, preferences, and the sonic textures you want to create.
Designing an efficient pedal board layout is both an art and a science. It requires a balance of practical considerations, signal flow principles, and creative exploration. By optimizing your pedal board layout, you can streamline your effects chain, reduce signal interference, and unlock your full creative potential as a guitarist. Whether you prefer a classic or unconventional layout, the key is to ensure that your pedal board becomes an extension of your musical expression, making your journey as a guitarist more enjoyable and inspiring.
Content Generated by ChatGPT